How to Design Custom Socks for Your Brand: A Step-by-Step Guide
By Stand4 Socks · Last updated 30 September 2026
The best custom sock designs use a limited colour palette, clear artwork and details that remain recognisable when knitted into fabric.
You do not need to arrive with a finished sock design. A logo, set of brand colours and a short explanation of who the socks are for can be enough for the design team to create the first mockup.
Here is how the process works, from the initial brief to the finished pair.
1. Decide What the Socks Need to Do
Start with the reason for creating the socks.
They might be designed for:
- Employee welcome kits
- Company events
- Client gifts
- University merchandise
- Fundraising campaigns
- Product launches
- Team celebrations
- Conferences and trade shows
- Membership packs
- Community programmes
The intended use affects the design.
Socks for an open event may need bold colours and immediately recognisable branding. An employee gift can use quieter details, internal references or a pattern that works with everyday clothing.
Before choosing the artwork, answer three questions:
-
1Who will receive the socks?
-
2When and where will they receive them?
-
3What should they understand about the design?
These answers give the designer a clearer starting point.
2. Gather Your Brand Assets
You do not need to create the sock artwork yourself, but the design team will need accurate brand materials.
Send:
3. Choose a Clear Design Direction
A custom sock does not have to reproduce every part of your visual identity at once.
Most successful designs begin with one main direction:
Logo-led
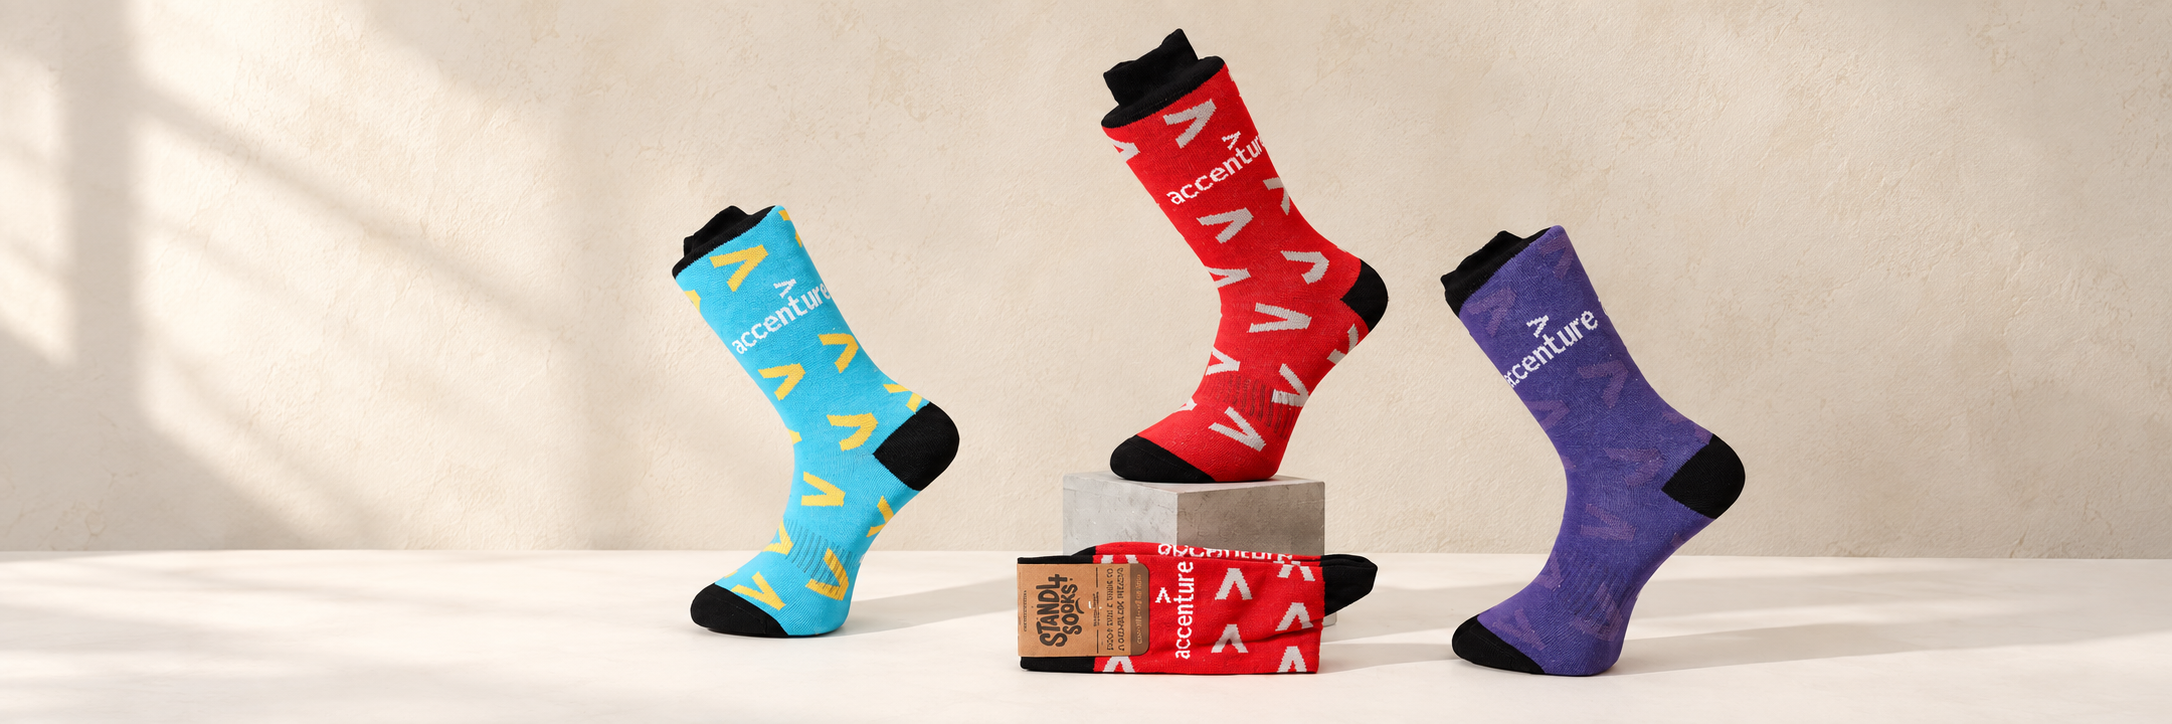
The company or organisation logo becomes the main feature, either as a single element or a repeated pattern.
Pattern-led
Shapes, icons or product references are repeated across the sock. This can make the design feel more wearable and less promotional.
Colour-led
The sock uses the organisation’s colours as the main visual feature, with the logo added more subtly.
Story-led
The design includes details connected to a place, milestone, campaign or shared experience.
Message-led
A short word, date or phrase is included as part of the design. Text needs to remain brief enough to read when knitted.
Choose one primary idea first. Supporting details can then be added without making the sock feel crowded.
Every pair of custom socks ordered from Stand4 Socks gives a specially made pair to someone experiencing homelessness through the company’s Buy-One-Give-One model.
More than 850,000 pairs have been donated so far.
This gives the design an additional story. Your employees, clients or event attendees receive a pair created for them, while the order also helps provide an essential item to someone who needs it.
The impact message can be included on a custom label or accompanying card if you want recipients to understand what their pair has helped provide.
Send us your logo, colours and estimated quantity. We can create a free initial sock mockup within 24 working hours.
4. Plan Where Each Element Will Appear
A sock has several areas that can carry colour or artwork:
- 01Cuff
- 02Leg
- 03Ankle
- 04Heel
- 05Foot
- 06Toe
- 07Sole
- 08Packaging or label
The leg is normally the most visible part when the sock is worn. It works well for logos, patterns and recognisable brand elements.
The foot may be hidden inside a shoe, but it can carry a secondary message or detail. The toe and heel can use contrasting colours to frame the design.
Think about the pair as a complete set. Both socks can match, or the left and right socks can use complementary artwork.
If the socks will be photographed or displayed in packaging, ask how the design will appear before and after they are worn.
5. Keep the Colour Palette Focused
A smaller palette usually produces a clearer knitted design.
Begin with:
Very similar shades may be difficult to distinguish once knitted together. Fine gradients, transparency and photographic effects may also need to be simplified.
Provide official colour references where possible. The production team can then identify the closest available yarn colours.
Remember that colours displayed on a monitor may look slightly different when translated into yarn. Review the mockup and physical sample carefully if colour matching is especially important.
6. Simplify Logos and Small Details
A sock is made from interlocking stitches, so artwork behaves differently from a logo displayed on a screen.
Fine lines, small text and highly detailed illustrations may need to be adjusted.
A designer may recommend:
- Thickening a fine line
- Enlarging a small symbol
- Removing unnecessary detail
- Increasing contrast
- Shortening text
- Repositioning an element
- Using a simplified version of the logo
- Moving additional information to the label
These changes help the finished design remain legible. They should preserve the recognisable parts of the brand rather than redesigning it.
If your organisation has a simplified logo mark or social-media icon, it may work particularly well on a sock.
7. Understand Knit-In, Printed and Embroidered Details
Different decoration methods suit different types of artwork.
Knit-in designs
The artwork is created using coloured yarn as the sock is made. This works well for logos, stripes, repeating patterns, icons and simple text.
Printed designs
Printing may suit artwork that uses more colours or details than a standard knitted design can reproduce. Ask how the print will behave when the fabric stretches.
Embroidered details
Embroidery can add a raised logo or small feature after the sock has been produced. It works best when the embroidered area is kept focused.
The right option depends on the artwork, quantity, material, deadline and intended use.
You do not need to choose the production method before asking for a mockup. Share the artwork and let the supplier explain which method is suitable.
8. Choose the Sock Specification
The design also needs to work with the physical sock.
Confirm:
Stand4 Socks commonly offers broad sizing options such as 3–8 and 9–12, depending on the selected product and order specification.
Broader size ranges can make the socks easier to distribute at events, across remote teams or as part of an ongoing welcome programme.
For more help with materials, sizing and order quantities, read our custom sock sizing, materials and MOQ guide.
9. Review the Mockup Carefully
The first mockup shows how the supplied artwork can be translated into a sock design.
When reviewing it, check:
Try to collect feedback from all decision-makers at the same time. Sending one clear set of comments reduces repeated revision rounds.
Useful feedback is specific.
Final approval should come from the person authorised to confirm brand use, spelling and order details.
10. Design the Packaging Alongside the Sock
Packaging can provide information that would be difficult to include in the knitted design.
A custom label can contain:
- Organisation name
- Campaign message
- Event information
- A recipient message
- Buy-One-Give-One information
- Care instructions
- A QR code
- Website details
- Sustainability or impact information
Keep the label easy to scan. It does not need to repeat every element already shown on the sock.
If the socks will be posted individually or placed inside a gift box, confirm the packaging dimensions before finalising the rest of the kit.
11. Approve the Final Details Before Production
Before production begins, confirm:
Check the approved artwork one final time. Small spelling errors or incorrect dates become much harder to address after production begins.
Your supplier should also confirm the expected production and delivery schedule for the chosen specification.
For help planning the wider order, read What Affects Custom Sock Costs? A Planning Guide.
Custom Sock Design Brief Checklist
Send the following information when requesting your first mockup:
If some details are still undecided, say so. The design team can help identify what needs to be confirmed first.
Frequently Asked Questions
Do I need to design the socks myself?
No. You can send your logo, brand colours and a description of what the socks are for. The design team can turn these materials into an initial sock mockup.
What file type should I send for my logo?
A vector file such as AI, EPS or SVG is usually best. A clear, high-resolution PNG may also be suitable. Avoid screenshots or small, compressed images where possible.
Can a detailed logo be knitted into a sock?
It may need to be simplified. Fine lines, small text and detailed shading do not always translate clearly into knitted fabric. The designer can adjust the artwork while retaining the main brand features.
Can the two socks have different designs?
Yes. A pair can use matching artwork or complementary left and right designs. Make sure both sides are shown clearly during the approval process.
Can we see the design before ordering?
Yes. Stand4 Socks can provide a free knit-accurate mockup using your supplied logo, colours or brand guidelines. Revisions can be made before production is approved.
What is the minimum order for custom socks?
Custom sock orders can start from 30 pairs per design, depending on the chosen product and specification. Share your required quantity, sizes and deadline when requesting a quote.
Start Your Custom Sock Design
A strong custom sock design begins with a clear purpose, recognisable artwork and a focused set of colours.
You do not need to prepare production-ready artwork. Send us your logo, brand colours, estimated quantity and delivery date, and we will help translate the idea into a practical sock design.
Get your free custom sock mockup